Android tutorial - Android Options Menu- android app development - android studio - android development tutorial
Learn android - android tutorial - Android options menu - android examples - android programs
What is android option menu?
- Android Option Menu is a floating menu which displays a list of menu items on long click of a device menu button. In android application menu is one of the important user interface entity which provides some action options for a particular view.
- Android Option Menu are the primary menus of android. They can be used for settings, search, delete item etc.
- Here, we are going to see two examples of option menus. First, the simple option menus and second, options menus with images.
- Here, we are inflating the menu by calling the inflate() method of Menu Inflater class.
- To perform event handling on menu items, you need to override on Options Item Selected() method of Activity class.
Android Option Menu Example
- Let's see how to create menu in android. Let's see the simple option menu example that contains three menu items.
activity_main.xml
- We have only one textview in this file.
- File: activity_main.xml
<RelativeLayout xmlns:androclass="http://schemas.android.com/apk/res/android"
    xmlns:tools="http://schemas.android.com/tools"
    android:layout_width="match_parent"
    android:layout_height="match_parent"
    android:paddingBottom="@dimen/activity_vertical_margin"
    android:paddingLeft="@dimen/activity_horizontal_margin"
    android:paddingRight="@dimen/activity_horizontal_margin"
    android:paddingTop="@dimen/activity_vertical_margin"
    tools:context=".MainActivity" >

      <TextView
      android:layout_width="wrap_content"
      android:layout_height="wrap_content"
      android:text="@string/hello_world" />

</RelativeLayout>
menu_main.xml
- It contains three items as show below. It is created automatically inside the res/menu directory.
- File: menu_main.xml
<menu xmlns:androclass="http://schemas.android.com/apk/res/android" >
    <item  android:id="@+id/item1"
        android:title="Item 1"/>
    <item  android:id="@+id/item2"
        android:title="Item 2"/>
    <item  android:id="@+id/item3"
        android:title="Item 3"/>
</menu>
click below button to copy the code from android tutorial team
Activity class
- This class displays the content of menu.xml file and performs event handling on clicking the menu items.
- File: MainActivity.java
package com.wikitechy.optionmenu;
import android.os.Bundle;
import android.app.Activity;
import android.view.Menu;
import android.view.MenuItem;
import android.widget.Toast;
public class MainActivity extends Activity {
    @Override
    protected void onCreate(Bundle savedInstanceState) {
        super.onCreate(savedInstanceState);
        setContentView(R.layout.activity_main);
        }
        @Override
        public boolean onCreateOptionsMenu(Menu menu) {
        // Inflate the menu; this adds items to the action bar if it is present.
	       getMenuInflater().inflate(R.menu.main, menu);//Menu Resource, Menu
           return true;
           }
        @Override
        public boolean onOptionsItemSelected(MenuItem item) {
	       switch (item.getItemId()) {
	           case R.id.item1:
	           Toast.makeText(getApplicationContext(),"Item 1 Selected",Toast.LENGTH_LONG).show();
	           return true;
	           case R.id.item2:
	               Toast.makeText(getApplicationContext(),"Item 2 Selected",Toast.LENGTH_LONG).show();
	           return true;
	           case R.id.item3:
	               Toast.makeText(getApplicationContext(),"Item 3 Selected",Toast.LENGTH_LONG).show();
	           return true;
	           default:
	               return super.onOptionsItemSelected(item);
	       }
	   }
}
click below button to copy the code from android tutorial team
- download this android example
Output:
- Output without clicking on the menu button.

- Output after clicking on the menu button.
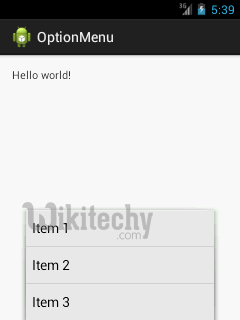
- Output after clicking on the second menu item .

Option Menu with Icon
- You need to have icon images inside the res/drawable directory. The android:icon element is used to display the icon on the option menu. You can write the string information in the strings.xml file. But we have written it inside the menu_main.xml file.
- File: menu_main.xml
	<menu xmlns:androclass="http://schemas.android.com/apk/res/android" >
	    <item  android:id="@+id/item1"
	        android:icon="@drawable/add"
	        android:title="Item 1"/>
	    <item  android:id="@+id/item2"
	        android:icon="@drawable/minus"
	        android:title="Item 2"/>
	    <item  android:id="@+id/item3"
	        android:icon="@drawable/delete"
	        android:title="Item 3"/>
	</menu>