Android tutorial - Radio Button Android- android app development - android studio - android development tutorial
Learn android - android tutorial - Radio button android - android examples - android programs
Android radio buttons
- Radio buttons allow the user to select one option from a Set.
- You should use radio buttons for optional sets that are mutually exclusive if you think that the user needs to see all available options side-by-side.
- If it's not necessary to show all options side-by-side, use a spinner instead.
- To create each radio button option, create a RadioButton in your layout.
- However, because radio buttons are mutually exclusive, you must group them together inside a RadioGroup.
- By grouping them together, the system ensures that only one radio button can be selected at a time.
- In Android, you can use “android.widget.RadioButton” class to render radio button, and those radio buttons are usually grouped by android.widget.RadioGroup
- If RadioButtons are in group, when one RadioButton within a group is selected, all others are automatically deselected.
- We show you how to use XML to create two radio buttons, and grouped in a radio group. When button is clicked, display which radio button is selected.
1. Custom String
- Open “res/values/strings.xml” file, add some custom string for radio button.
File : res/values/strings.xml
<?xml version="1.0" encoding="utf-8"?>
<resources>
    <string name="hello">Hello World, MyAndroidAppActivity!</string>
    <string name="app_name">MyAndroidApp</string>
    <string name="radio_male">Male</string>
    <string name="radio_female">Female</string>
    <string name="btn_select">Select</string>
</resources>
click below button to copy the code from android tutorial team
2. RadioButton
- Open “res/layout/main.xml” file, add “RadioGroup“, “RadioButton” and a button, inside the LinearLayout.
- Radio button selected by default.
- To make a radio button is selected by default, put android:checked="true" within the RadioButton element. In this case, radio option “Male” is selected by default.
File : res/layout/main.xml
<?xml version="1.0" encoding="utf-8"?>
<LinearLayout xmlns:android="http://schemas.android.com/apk/res/android"
    android:layout_width="fill_parent"
    android:layout_height="fill_parent"
    android:orientation="vertical" >

    <RadioGroup
        android:id="@+id/radioSex"
        android:layout_width="wrap_content"
        android:layout_height="wrap_content" >

        <RadioButton
            android:id="@+id/radioMale"
            android:layout_width="wrap_content"
            android:layout_height="wrap_content"
            android:text="@string/radio_male"
            android:checked="true" />

        <RadioButton
            android:id="@+id/radioFemale"
            android:layout_width="wrap_content"
            android:layout_height="wrap_content"
            android:text="@string/radio_female" />

    </RadioGroup>

    <Button
        android:id="@+id/btnSelect"
        android:layout_width="wrap_content"
        android:layout_height="wrap_content"
        android:text="@string/btn_select" />

</LinearLayout>
click below button to copy the code from android tutorial team
3. Code Code
- Inside activity “onCreate()” method, attach a click listener on button.
File : MyAndroidAppActivity.java
package com.wikitechy.android;

import android.app.Activity;
import android.os.Bundle;
import android.view.View;
import android.view.View.OnClickListener;
import android.widget.Button;
import android.widget.RadioButton;
import android.widget.RadioGroup;
import android.widget.Toast;

public class MyAndroidAppActivity extends Activity {

  private RadioGroup radioSexGroup;
  private RadioButton radioSexButton;
  private Button btnDisplay;

  @Override
  public void onCreate(Bundle savedInstanceState) {
	super.onCreate(savedInstanceState);
	setContentView(R.layout.main);

	addListenerOnButton();

  }

  public void addListenerOnButton() {

	radioSexGroup = (RadioGroup) findViewById(R.id.radioSex);
	btnDisplay = (Button) findViewById(R.id.btnDisplay);

	btnDisplay.setOnClickListener(new OnClickListener() {

		@Override
		public void onClick(View v) {

		        // get selected radio button from radioGroup
			int selectedId = radioSexGroup.getCheckedRadioButtonId();

			// find the radiobutton by returned id
		        radioSexButton = (RadioButton) findViewById(selectedId);

			Toast.makeText(MyAndroidAppActivity.this,
				radioSexButton.getText(), Toast.LENGTH_SHORT).show();

		}

	});

  }
}
click below button to copy the code from android tutorial team
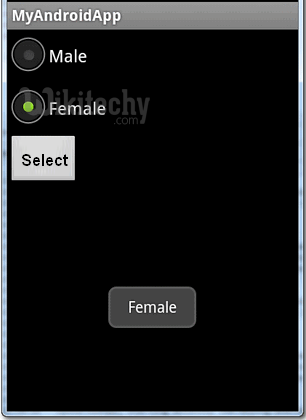
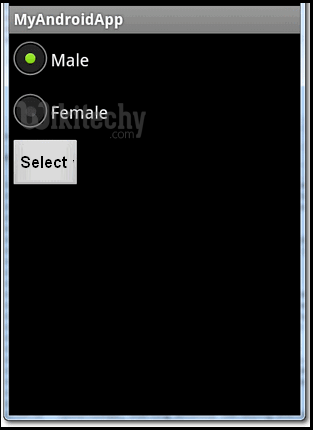
4. Demo - android emulator - android tutorial
- Run the application.
- Result, radio option “Male” is selected.
- Select “Female” and click on the “display” button, the selected radio button value is displayed.